After seeing a bunch of little kids having fun with bubble guns at Disneyland I decided I had to have one. Based on the joy observed in these kids I was convinced that owning a light up bubble blaster was a sure way to measurably improve joy and happiness in one’s life.
$12 later I could manufacture as much bubbly joy and happiness as I wanted to. But then I got home and started wondering – what am I going to do with this thing?
Automate it. Obviously. The less work I have to do to create happiness the better, I say!
After taking some measurements with my trusty digital caliper (I’ve had good luck with this one) and coming up with a vague idea, I headed to SOLIDWORKS to model a couple 3D printable parts.
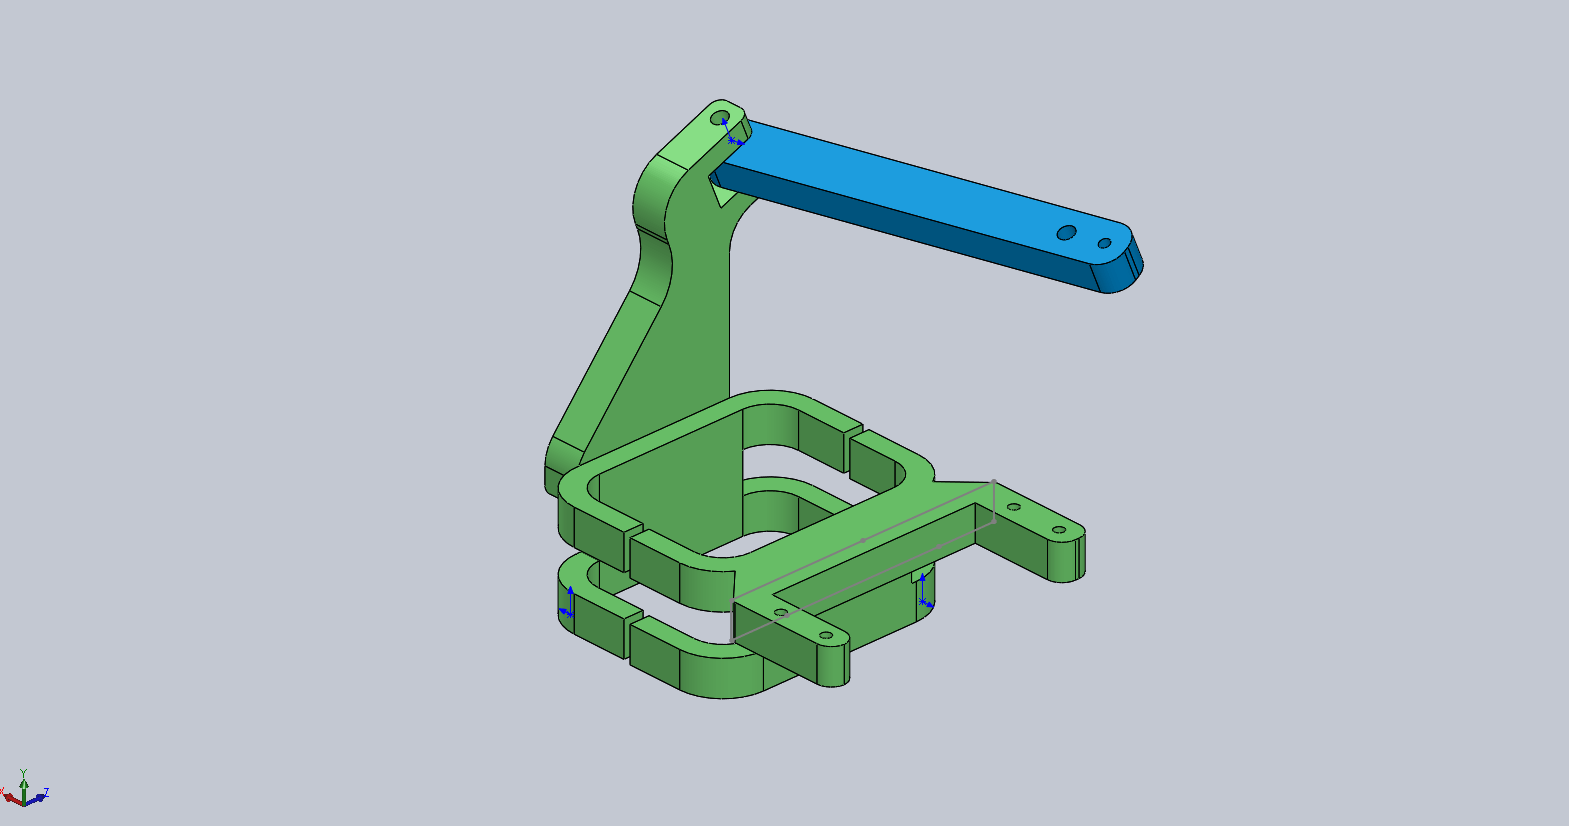
Here’s the idea: The two piece bracket clamps onto the bubble gun grip via zip-tie. Then a standard servo mounts to the bracket which pulls the leaver into the bubble gun trigger at the command of an Arduino Micro. Instant bubbly goodness!
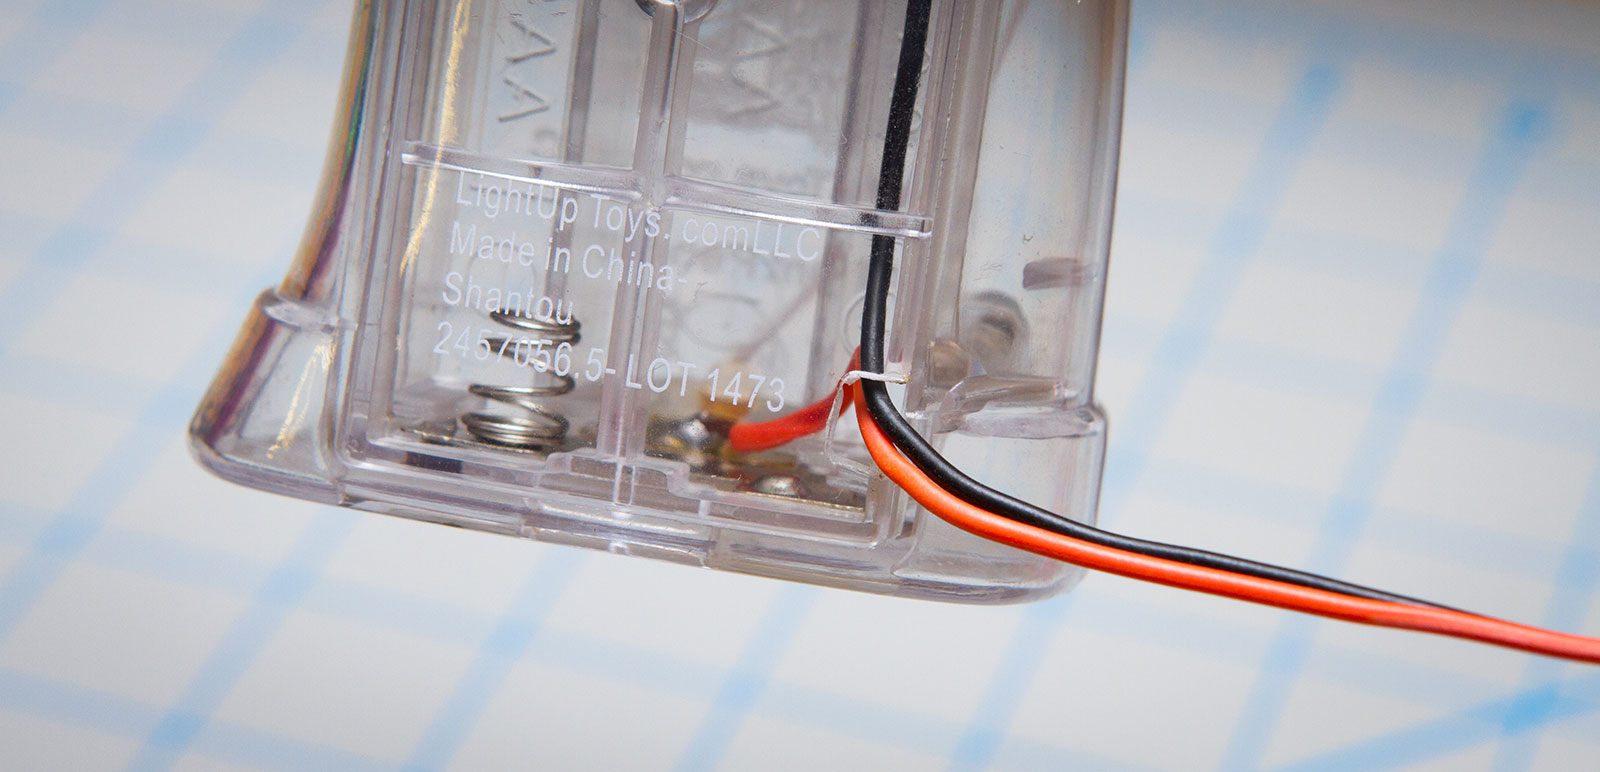
The servo is going to need some power. Fortunately the 3 AA batteries powering the gun are just about right so I soldered a pair of wires into the battery bay and routed them out through a newly dremeled slot in the door.
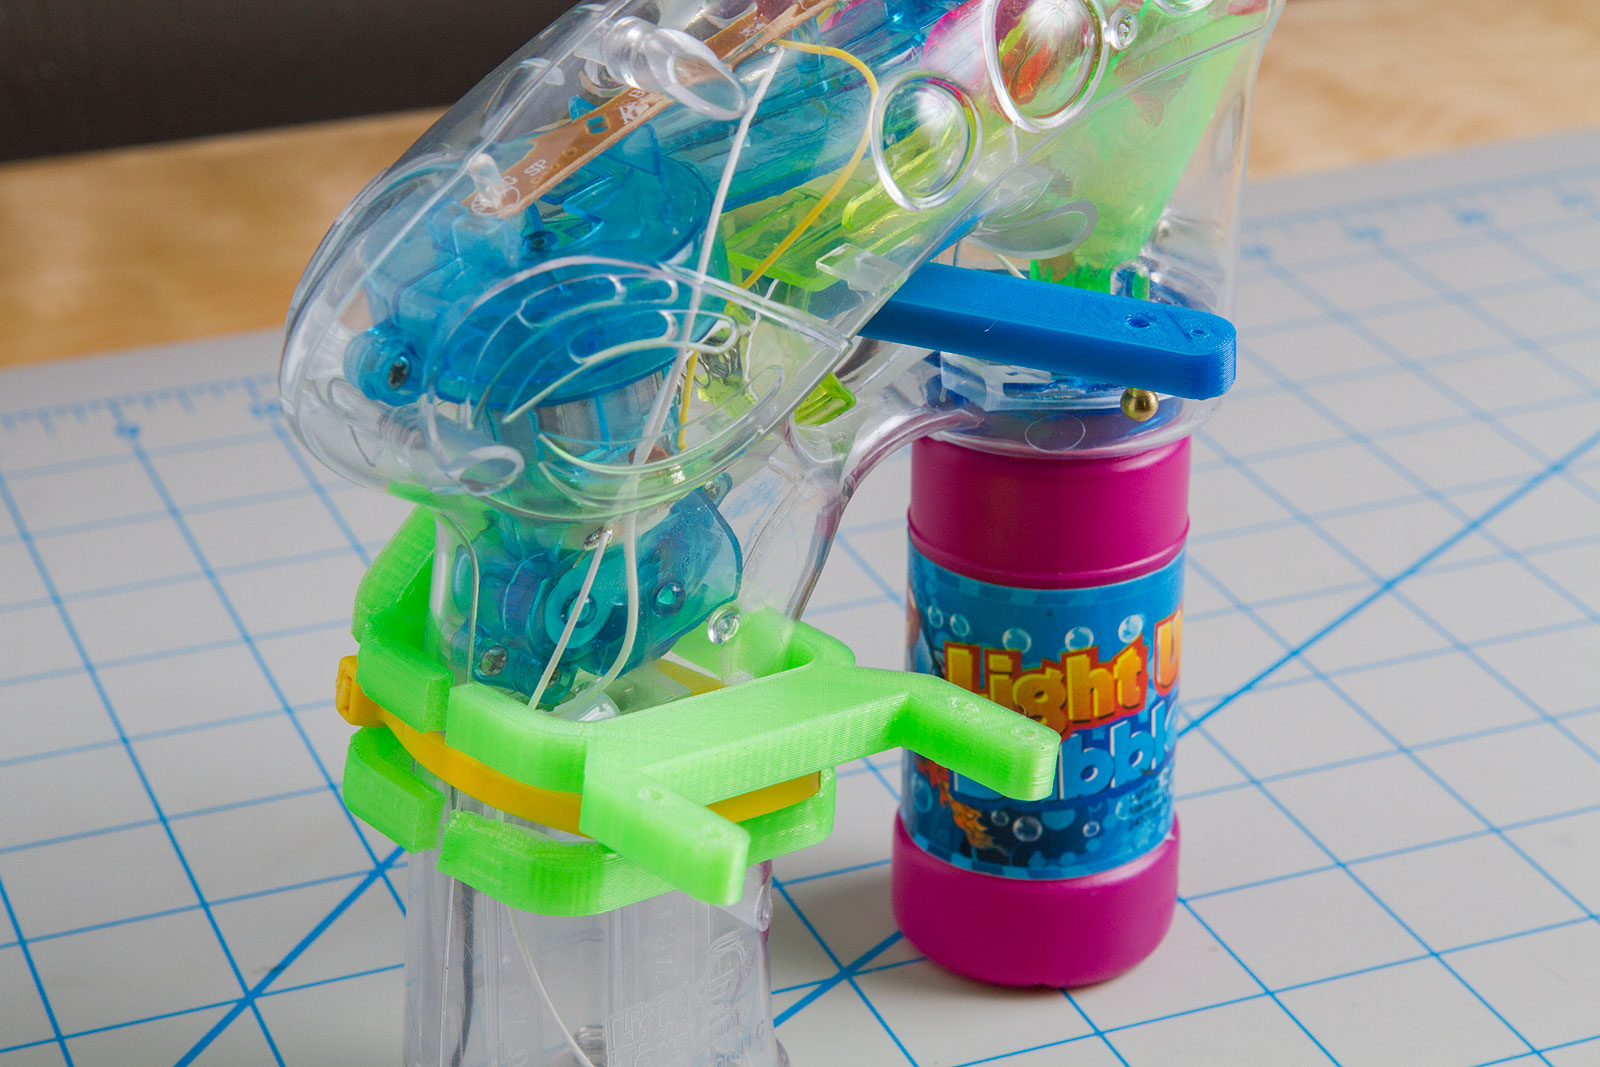
I printed the three individual parts with my Printrbot Simple Metal 3D printer. I’ve been really happy with this printer, and these parts came out looking great. Amazingly, everything fit on the first try, which never happens. I must be getting better at measuring or something.
Now that the brackets are in place, let’s take a look at the Arduino software. The full sketch code is below, but here’s the gist: Any time the Arduino receives the word bubbles over the USB serial connection it activates the servo sequence to pull the leaver.
I found that the best way to get bubbles is to pull the trigger a couple times quickly before holding it down; Holding it down on the first pull only makes bubbles sometimes. So the Arduino does a cycle of two pulls which seems to consistently get a good bubble blast.
#include <Servo.h>

#define SERVO_PIN 9
#define SERVO_POS_OFF 40
#define SERVO_POS_ON  100

Servo servo;
String buffer = "";

boolean bubbling = false;
unsigned long bubbleLoopCount = 0;

void setup()
{
	servo.attach(SERVO_PIN);
	servo.write(SERVO_POS_OFF);

	Serial.begin(9600);
	buffer.reserve(64);
	Serial.println("Ready!");
}

void loop()
{
	readSerial();

	if(bubbling){
		bubbleUpdate();
	}
}

void readSerial()
{
	while(Serial.available()){
		char inChar = (char)Serial.read();
		if(inChar == '\n') {
			processCommand(buffer);
			buffer = "";
		} else {
			buffer += inChar;
		}
	}
}

void processCommand(String command)
{
	if(command == "bubbles"){
		bubbling = true;
	}
}

void bubbleUpdate()
{
	//Naive state changes, modify values to change timing
	//Detach servo at cycle end to save power.
	if(bubbleLoopCount == 0){
		servo.attach(SERVO_PIN);
		servo.write(SERVO_POS_ON);
	}
	if(bubbleLoopCount == 80000){
		servo.write(SERVO_POS_OFF);
	}
	if(bubbleLoopCount == 110000){
		servo.write(SERVO_POS_ON);
	}
	if(bubbleLoopCount == 200000){
		servo.write(SERVO_POS_OFF);
	}
	if(bubbleLoopCount == 250000){
		bubbleLoopCount = 0;
		bubbling = false;
		servo.detach();
		return;
	}

  bubbleLoopCount++;
}
The code is simple but it does the job. Sending the bubbles command using the Arduino serial monitor works, but I’ve also made a little Chrome App that just has a big clickable “Bubbles” button.
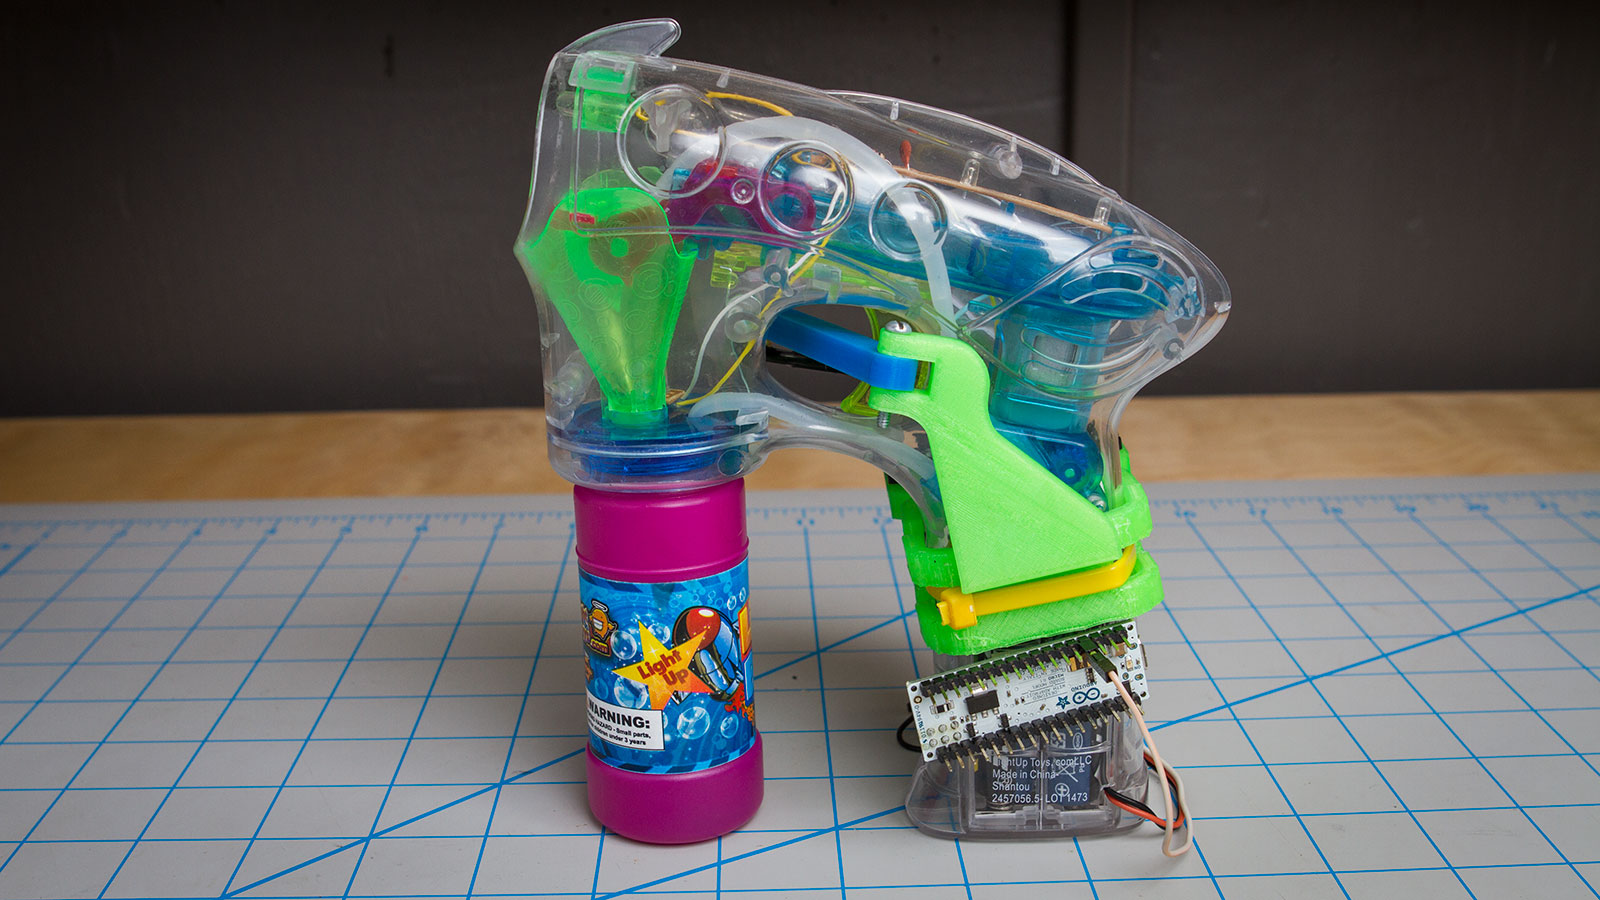
Hooking everything up was just a matter of sticking the Arduino on and connecting the servo signal wire.
This whole project took under two hours. I whipped up the code while the parts were printing and since it all went together on the first run it didn’t take much time at all.
Now all that’s left is to make more automated bubble guns (wireless upgrade perhaps?) and a big physical button to activate them all at once 🔵👈🎇
[STL files for the parts are on Thingiverse here: http://www.thingiverse.com/thing:1002979]