Activate all the things! This button makes it easy to activate something wirelessly and since it uses UDP broadcasts there’s no need to deal with IP addresses on either end.
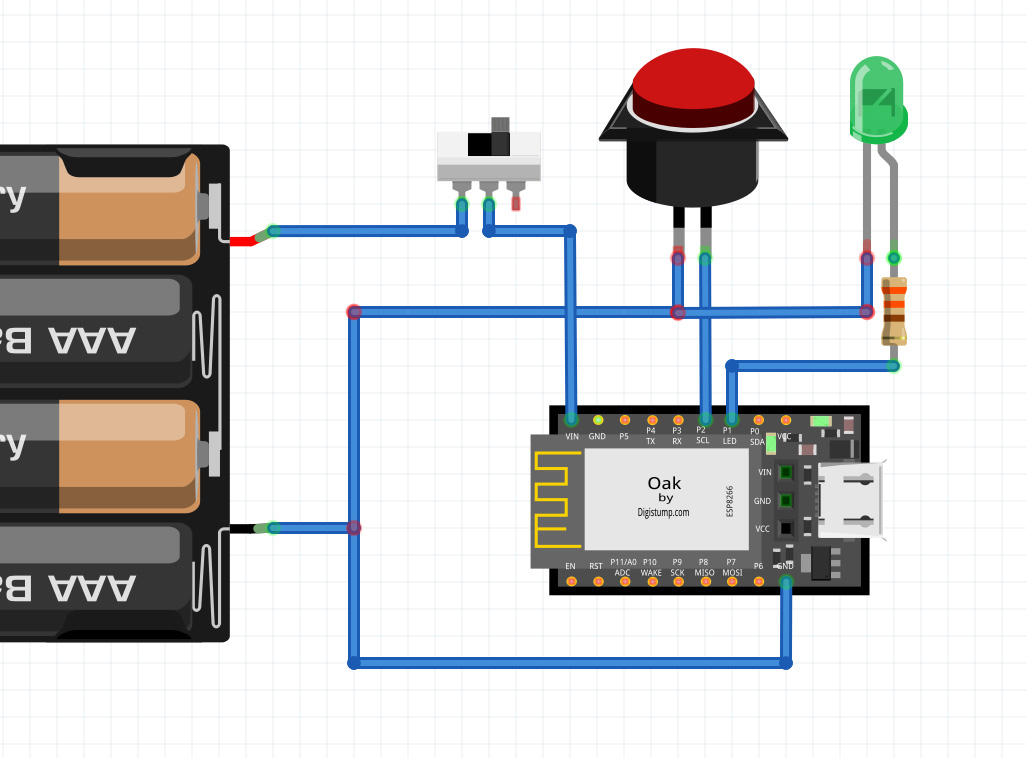
Here’s how it’s wired up:
Here’s the Arduino sketch for the Oak (if you haven’t used an Oak before, check out their getting started guide to get your Oak connected and Arduino IDE set up):
#include <ESP8266WiFi.h>
#include <WiFiClient.h>
#include <WiFiClientSecure.h>
#include <WiFiServer.h>
#include <WiFiUdp.h>

#define LED    1
#define BUTTON 2

#define BROADCAST_IP "255.255.255.255"
#define UDP_PORT 8888

WiFiUDP Udp;

void setup() {
  pinMode(LED, OUTPUT);
  pinMode(BUTTON,  INPUT_PULLUP);

  digitalWrite(LED, 0);

  Udp.begin(UDP_PORT);
}

int lastButtonState = HIGH;

void loop() {
  //Button reads as: HIGH = not pushed, LOW = pushed
  int buttonState = digitalRead(BUTTON);

  if(lastButtonState==HIGH && buttonState==LOW){
    //Switch seems pushed, but might be an electrical bounce. Wait 10ms
    //and if it's still down by then, it's probably a real press.
    delay(10);

    //Is is still pushed?
    buttonState = digitalRead(BUTTON);
    if(buttonState == LOW){
      //Yup still down, send the broadcast!
      char buf[32];
      sprintf(buf, "WIFIBUTTON\n");

      Udp.beginPacket(BROADCAST_IP, UDP_PORT);
      Udp.write(buf, strlen(buf));
      Udp.endPacket();

      //And blink the LED for good measure
      digitalWrite(LED, 1);
      delay(300);
      digitalWrite(LED, 0);
    }
  }

  lastButtonState = buttonState;
}
What would you have the button do? 🤔💡